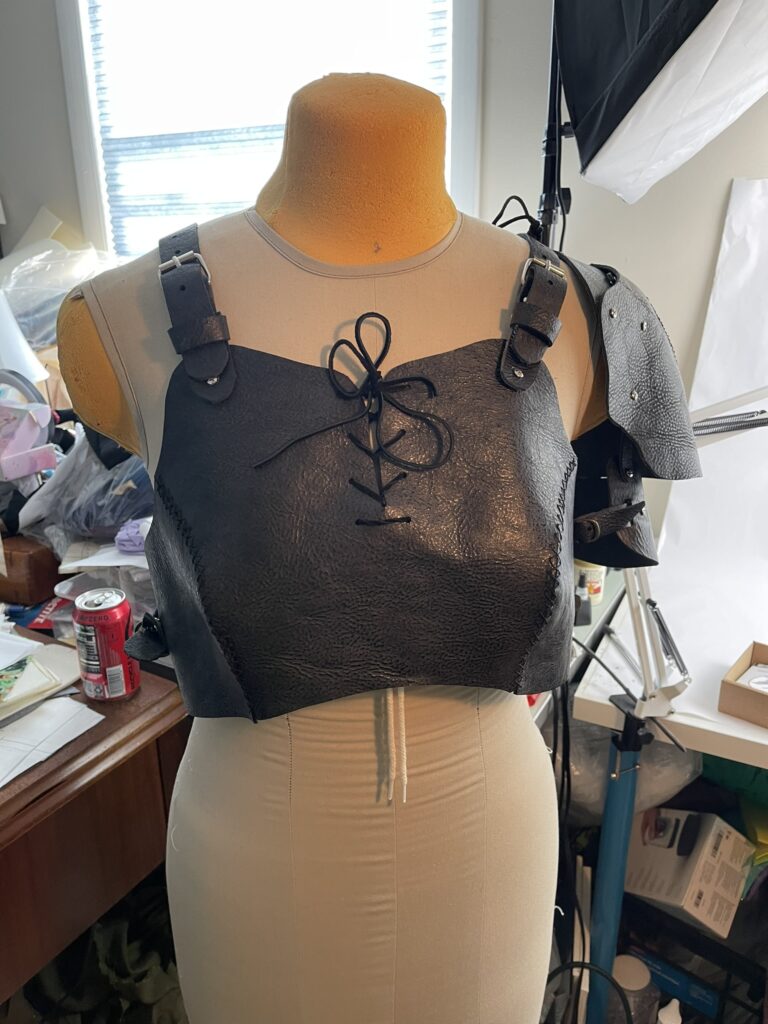
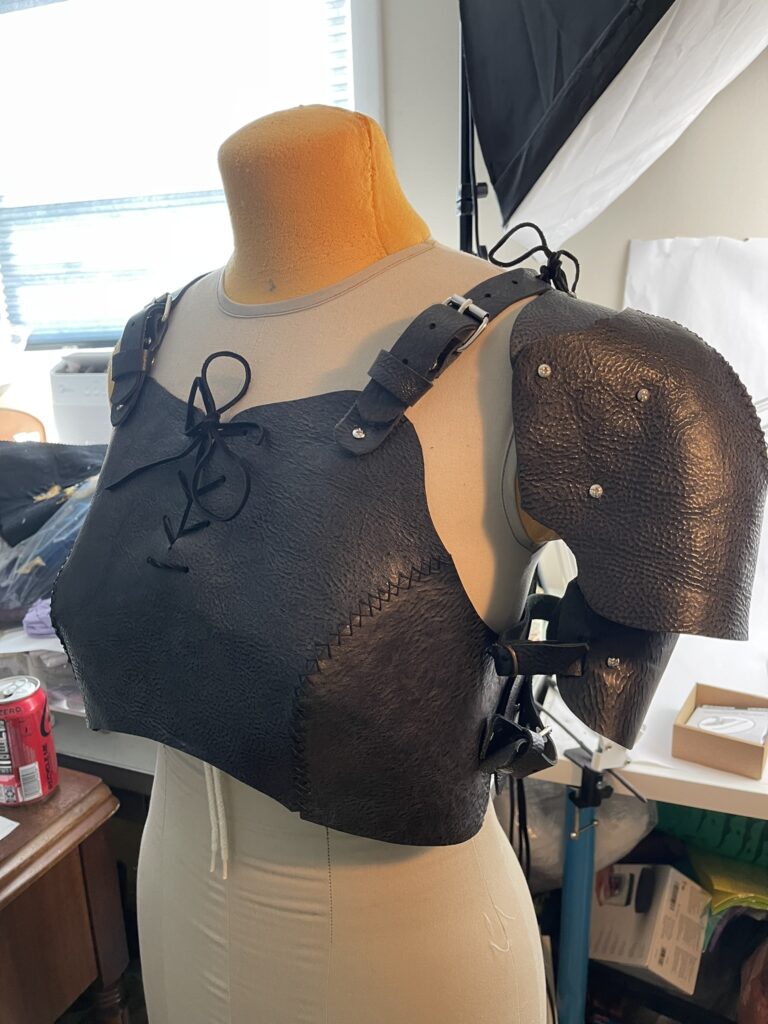
I recently made myself a very simple set of leather armor for the Ren Faire, and it surprised me how easy and fast it was to do. If this is something you want to try but might be intimidated by leather crafting, here is what I did for my first big leather project.
Please note that there is a lot more to leathercraft in general than I present here. I did not finish the edges and I used 5/6oz leather instead of the usual 8/9oz that would be more stiff. But for a beginner project that gets you a cool look fairly easily, I hope this helps! In addition, you could even use the below steps to make armor from vinyl or EVA foam, if you are more comfortable with those materials.
(Disclaimer: All products I have personally used that are mentioned here were purchased by me. Etsy links in this blog post are referral links, meaning I may receive a small commission from your click through. Thank you for supporting me!)
- Leather: As just mentioned, I used 5/6oz leather from Tandy Leather Factory for my armor. It was a piece I already had for another project, and there was plenty left. Using this weight gives a great look while still being thin enough to cut with scissors or a rotary cutter, and easy to punch holes in as well.
- Patterns: I used this demi-cuirass and this pauldron from The War Factory on Etsy, but there are a lot of great options. The War Factory also has a full cuirass and several belt/corset/harness patterns. Simple Good Leather has a pattern for a lovely corset belt. Beardfoot Crafting has a bunch of super cool fantasy patterns like this mushroom pauldron, but these patterns are much more advanced than the prior ones, so beginners beware.
- Hole punch: Thick leather is hand-sewn by punching holes for the needle to go through with a chisel, awl, or other punch. I already had one of these fancy hole punches, which worked great on the thickness of leather I was working with, but an awl works just as well. Use whatever tool you prefer for making approximately 1.5mm (for sewing through) and 3-4mm holes (for rivets).
- Other supplies: You will also need waxed thread for hand sewing leather, leather hand sewing needles, a rivet kit, and whatever buckles or other notions are called for by your pattern. All of these can be found in-person or online from Tandy Leather Factory. If you aren’t near a Tandy Leather, thread, needles, and rivets can also be found at your local craft store, but you may need to order buckles and other more specialized items online.
Once I had the materials, the steps to make the armor went like this:
- Print out the pattern. Like most PDF patterns, I was able to print out these at home, tape the larger pieces together as needed, and cut them out. I recommend cutting out the holes marked on the pattern as well so you can draw them directly onto the leather.
- Make a test version out of felt. Some thick felt works as a great cheap “muslin” for leather. Cut out your pieces and sew together by hand or sewing machine to check for sizing and see if you need to make any adjustments. Once you’re happy with the fit, move on to your leather.
- Trace the pattern pieces onto the leather. Since I was using black leather, chalk worked great. For lighter armor, you may be able to use a ballpoint pen, although blue tailor’s chalk might be a safer bet. The cuirass pattern I used had a couple mirrored pieces, so I traced one side, then flipped it over and aligned it opposite my original lines, and traced it again. Don’t forget to mark any necessary punch holes.
- Punch holes. You will need to punch both rivet holes and sewing holes. The sewing holes should be large enough for your needle to pass through, but not larger. You will need to make them along any seams that need to be sewn, such as the princess seams on the cuirass or the dart on the pauldron. Rivet holes should be large enough to put the shaft of your rivets through. Double check placement before punching because the holes are permanent!
- Sew the seams. The patterns I used called for the “cross stitch”, similar to the embroidery style cross stitch. Here’s a video demonstrating how to do this stitch for joining leather.
- Assemble the remaining pieces using rivets. The patterns I used did not have step by step instructions, but all the rivet holes that needed to be joined were labeled as such, so assembly was straightforward. The cuirass just needed straps attached to the back panel and buckles in buckle holders attached to the front. The pauldron was slightly more complicated, with three large pieces that attached to each other via a series of straps, but the pattern was well labeled. Here is a video on installing rivets.
And that’s it! All that’s left is to strap on your armor and get to monster hunting! I’m very excited to wear my new armor to the ren faire, and I hope this helps with getting you started in making your own armor. Happy crafting!

