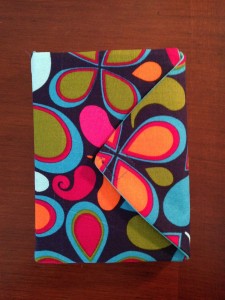
 Just a couple weeks ago I was introduced to the Hobonichi Techo. It’s called a planner, but it’s more like a combination planner/diary/scrapbook. You can use it not just to remember appointments but write about what you did that day, jot down ideas, doodle and sketch, or save things like ticket stubs.
The Hobonichi store sells a variety of lovely covers for the book, but most of them were sold out when I ordered my techo, so I decided to make my own. It’s simple, but I’m pleased with how it turned out! Here are the steps for making your own fabric techo cover:
Supplies:
- About 1/4 yard of fabric total (I used two different fabrics for the outside and the inside, so I needed slightly less of each). Quilting cotton works best, and it comes in fun patterns!
- About 1/4 yard fusible interfacing–as thick as you can find it.
- A small square of sew-on velcro.
- Pen and paper.
- Chalk or disappearing ink marker.
- Coordinating thread.
Start off by tracing your techo on a piece of paper. Trace it flat, then stand it on its spine and trace around the spine. Laying the book flat again, trace along the spine, then draw a triangle using the line as the base–this will be the pattern for the closure flap on the cover.
Cut out all three pieces. These are your basic pattern pieces. We’ll call them A, B, and C, like so: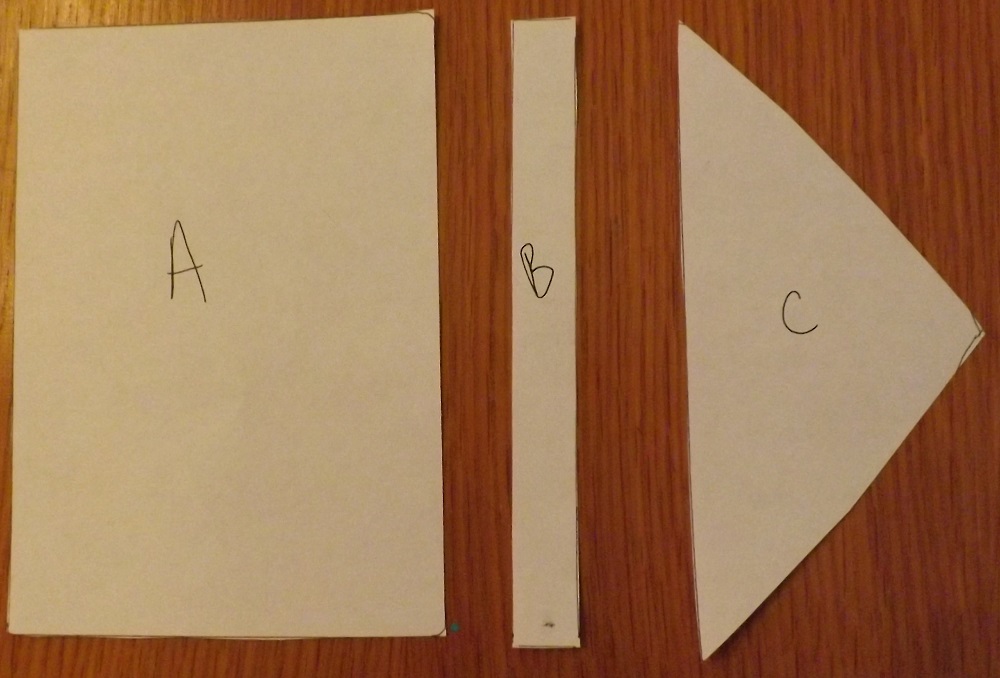
Using chalk or a disappearing ink marker on the wrong side of your outer fabric, draw a rectangle that is the width of 2 A pieces and 2 B pieces, and the height of the A piece. Place the C pattern piece on one of the narrow ends and trace. Add seam allowance all the way around, and cut.
From the inside fabric, cut out two A pieces, adding seam allowance to all sides except one of the long sides. Cut out two B pieces, adding seam allowance all the way around, and one C piece, also adding seam allowance along every side. From the interfacing, cut out 2 A pieces, 2 B pieces, and one C piece. Do not add seam allowance to the interfacing pieces.
Now that everything is cut out, the next step is to prepare the lining pieces. Take one A piece and hem the side that does not have seam allowance. The hemmed edge will be near the book binding on the inside of the front cover. For the other A piece, hem the edge without seam allowance, then sew the other edge to one of the B pieces right sides together. Sew the C piece to the other edge of the B piece right sides together, then press open the seams. For the remaining B piece, hem both long edges.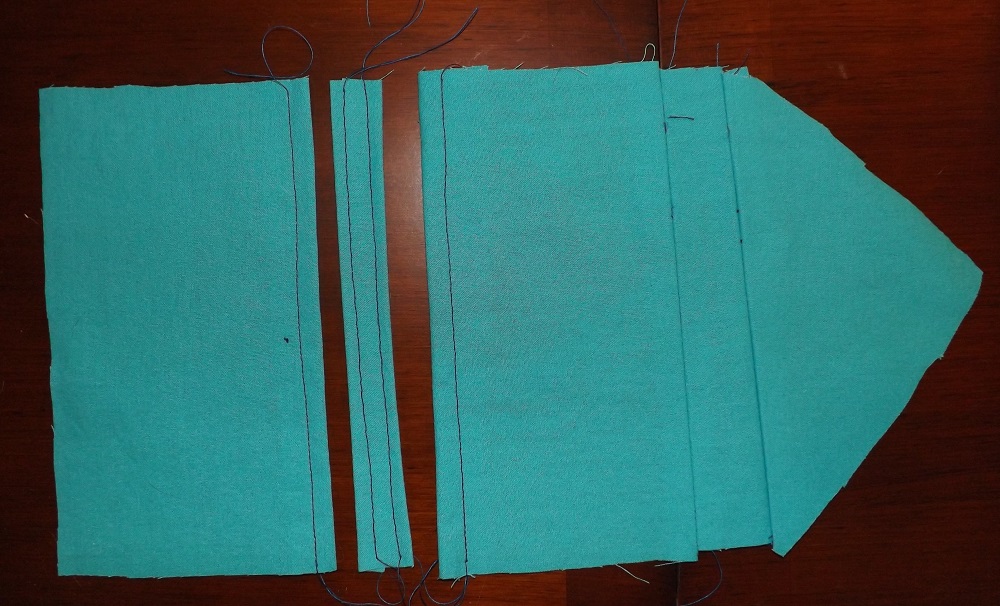
Following the interfacing instructions, attach each piece to the wrong side of the outer fabric as in the photo, alternating between A and B pieces, then piece C on the end. The interfacing makes the fabric stiff, so leaving very small gaps in the interfacing will allow the cover to fold around the book.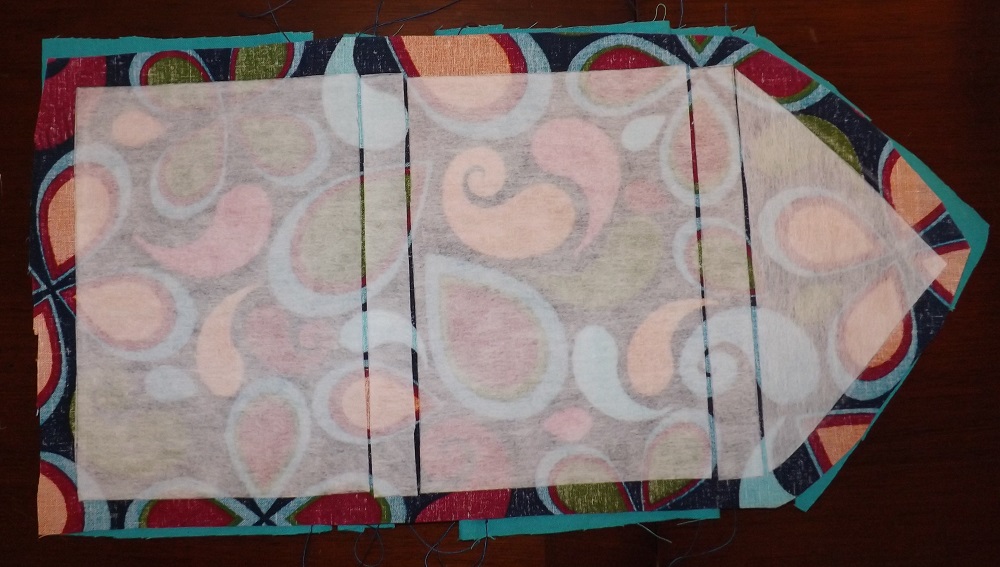
Before attaching the lining to the outer fabric, we need to sew the velcro to the front of the cover so that the flap can close. Fold the outer fabric piece around your techo and mark where the tip of the flap touches the front of the cover so that it closes snugly (ignore seam allowance when taking this measurement; it won’t be there after you turn the cover right-side-out). Sew half of the velcro square to this spot and put the other half somewhere safe. (If you are adding pockets, embroidery, or other embellishments to the lining or the outside of the cover, now is the time to do it!)
Pin the lining pieces to the outer fabric piece right sides together. The triangle flaps should line up. The lone A piece should line up with the square end of the outer fabric piece with the hemmed edge on the inside, and the lone B piece should line up with the first B piece of interfacing (there will be gaps around the B lining piece where you can see the outer fabric). Sew all the way around the edge, staying very close to the edges of the interfacing. Trim the seam allowance and clip the corners, then turn the cover right-side-out. Topstitch down the center B piece (this will create two rows of stitches down the spine of the cover).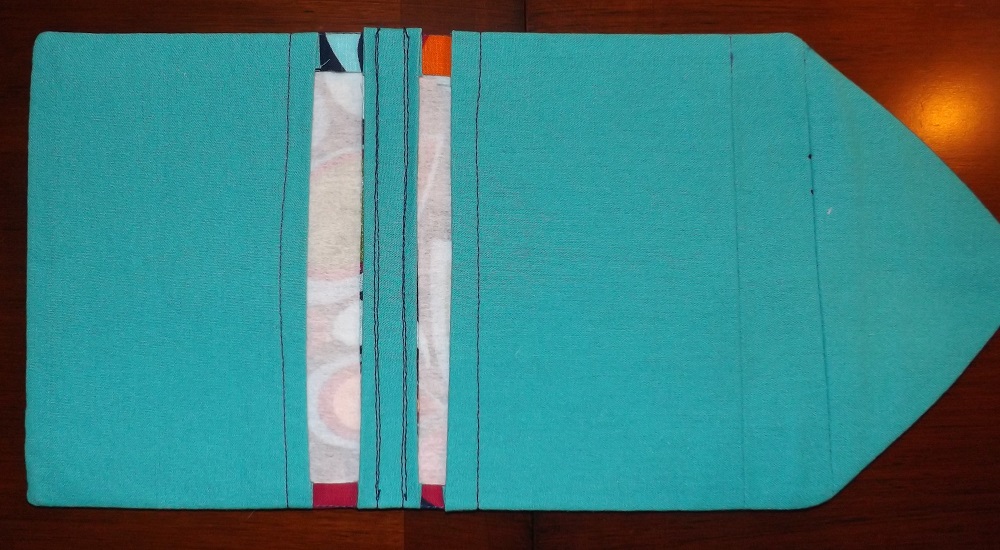
Carefully poke out the corners with something pointy, then press the cover. All that’s left is to sew the other half of the velcro square to the corner of the flap. Then slide the cover of your techo into the pockets created by the lining. And you’re done!
Now that you know how to make a basic cover, you can customize the process any way you want. You can use two buttons and a ribbon instead of velcro. You could make a rectangular flap and attach elastic to both ends for a closure. Get rid of the flap entirely and make two loops for a pen holder/butterfly closure. Or you can add pockets to the lining pieces or embroidery or patches to the outer fabric. Get creative!
I loved this pattern and just had to print it. I do plan on making a few for my fauxbinichi. You’re right about all the really beautiful covers being gone. I still haven’t figured out the hobonichi web sight. Soon. Thank you for a pattern I actually understand!
I’m so happy you found it useful! Thank you!
Nice tutorial, I used it! Pictures in my website link here. Thank you, and happy new year!
Oh my gosh, it looks great!! Thanks for sharing it with me :D Happy new year!
I wish this tutorial was available in video form, as I’m much more of a visual learner. But thank you for this, and I’ll do my best to figure it out. :)
Thank you for the feedback, Michala. I would love to make a video version of this tutorial at some point. In the meantime, if you have any questions, feel free to ask!
Thanks for the instructions, I have made one for myself! I combined A, B and C when cutting out the liner so I wouldn’t have to sew them together later, but otherwise followed your directions. It looks good!